Friday, May 29, 2020

Leafcutter Bees

By Adriane Good, MSU Extension Pondera County


Recently I received a call about a strange mass underneath the siding of a house near Valier. The mass was full of small greenish-brown tubes. Upon closer inspection, it turned out that the mass was a leafcutter bee nest!

Leafcutter bees are great pollinators and helpful to have around your yard. They are essential pollinators for some native plants, and they have been semi-domesticated in some areas to help alfalfa seed production. Next time you venture across the border into Southern Alberta, you might see some small tents in alfalfa fields - those belong to leafcutter bees!

Leafcutter bees are quite small – ranging from 1/5 of an inch to an inch long. They resemble small honeybees with their black and yellow coloring. They do their important job as a pollinator by catching and carrying pollen on the underside of their abdomen. Leafcutter bees like most broadleaf plants, but they have a particular fondness for lilacs, roses, and ash trees.

Leafcutter bees are solitary animals, unlike other insects such as honeybees and ants. Instead of living in colonies and building a nest together, leafcutter bees build nests by themselves and the females do all the work rearing their young. The nests of leafcutter bees contain several small cells that form a tube 4-8 inches long. They make these cells out of leaf cuttings, nectar, and pollen. Once the adult leafcutter bee lays her eggs in the nest, the young bees will stay inside and develop to adulthood, ready to emerge in the next season.

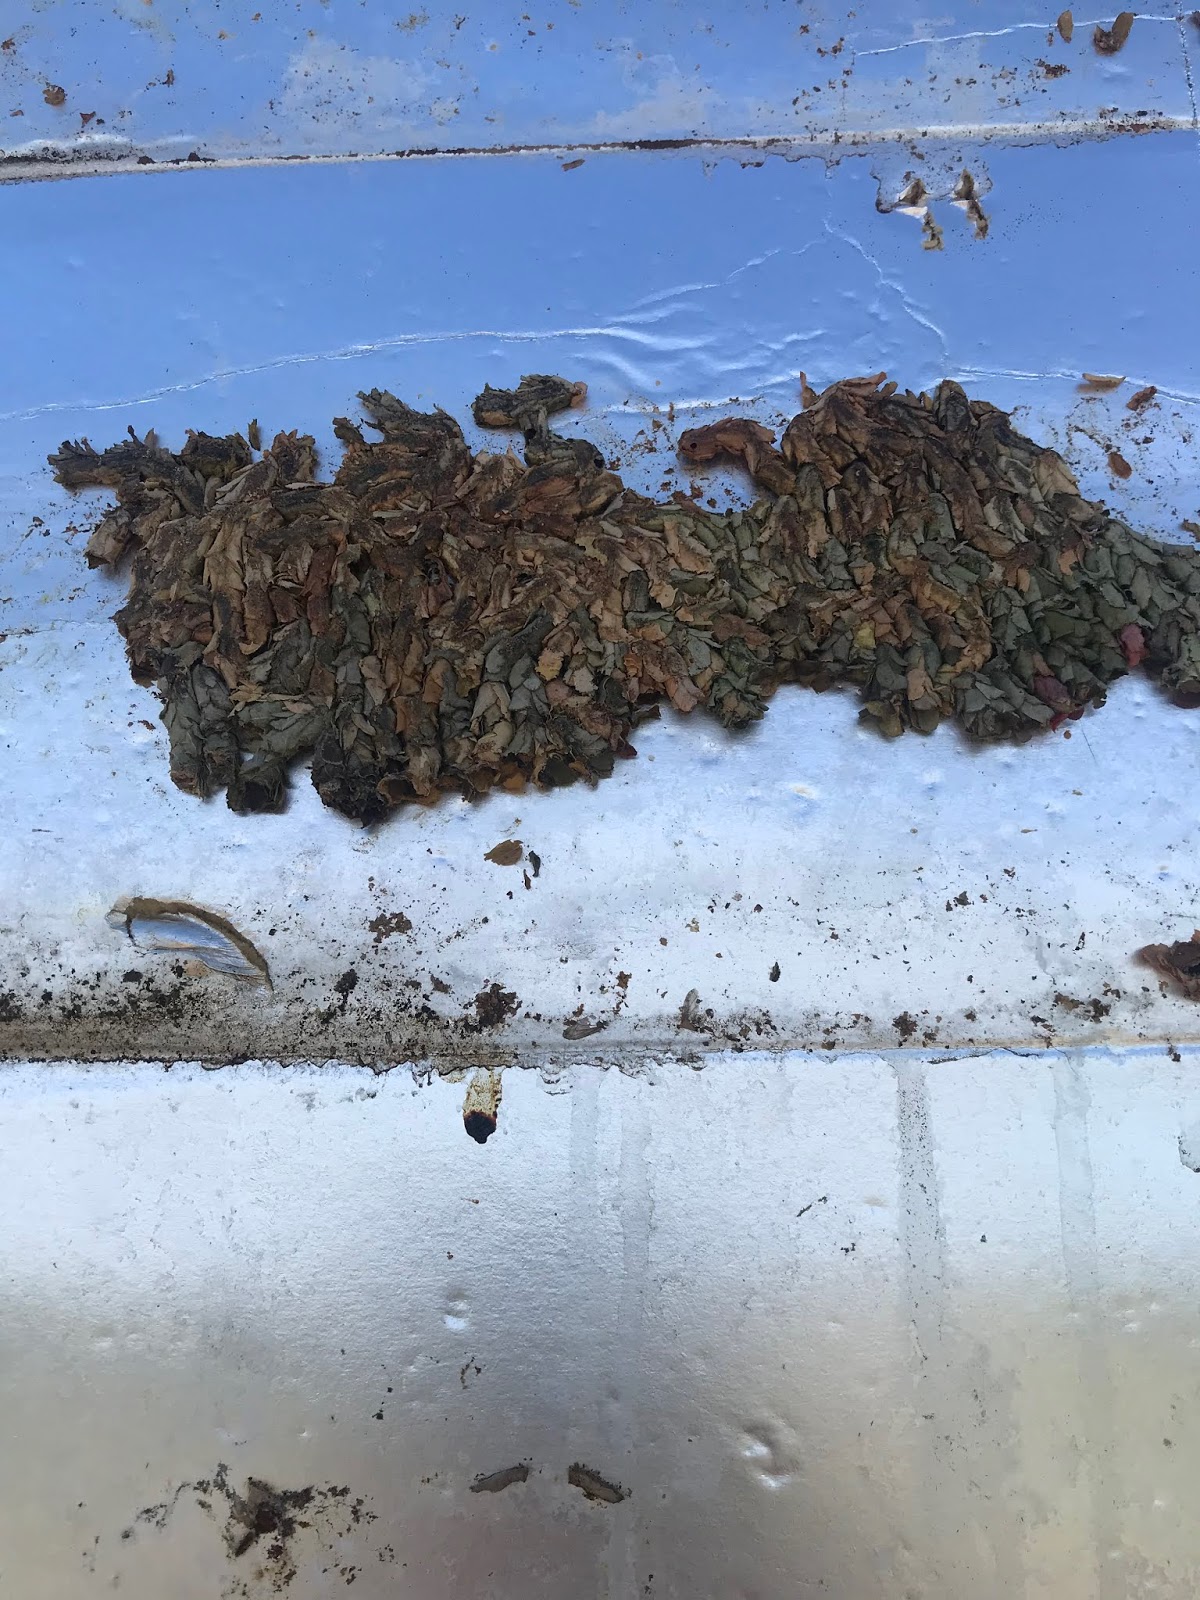
Leafcutter bee nests found under the siding of a house.

You may not notice the bees themselves in your yard, but you may see some evidence of leafcutter bee damage in your plants. To acquire the leaf cuttings for their nests, the leafcutter bees cut out small semi-circles from the leaves of plants. This damage is purely aesthetic and won’t hurt the plant at all. Leafcutter bees are also very non-aggressive, so as long as you aren’t bothering them, they won’t sting you. If they do, no worries, they have a very mild sting. The bees tend to build their nests in soft, rotting wood or other places they have easy access to. Unlike other insects that build their nests in wood, leafcutter bees don’t burrow further into the wood. So, the nest that was found under the siding of a house wasn’t causing any damage!

Evidence of leafcutter bee damage on a lilac.

Leafcutter bees are one of the best insects to have in your yard. If you find a nest in a place where you would not like a nest, remove it and then seal up any cracks you can find, and they probably won’t go back there. If you find some damage on your plants and you want to protect them, you can cover them with cheesecloth or loose netting to prevent the bees from getting to them. If you don’t mind a few holes in your plant’s leaves though, I highly encourage you to let the leafcutter bees roam your yard to continue their important pollination work!


Monday, May 25, 2020

Mythbusters: Epsom Salt and Tomatoes

Jesse Fulbright, MSU Liberty County Extension

Memorial Day seems to be a traditional time to put out some of tender garden plants in our area, such as tomatoes.  There are always little traditions or ways of planting that are passed down in families or make their way into popular culture.  Some of these are steeped in research-based techniques, while others may be great in areas of the country but not necessarily here.  One method of planting tomatoes that I hadn’t heard until recently was about adding Epsom salts to the hole when planting your tomatoes.  Some people will say that adding Epsom salt prevents blossom end rot in tomatoes.  It’s time to play myth buster and debunk this method of gardening. 
According to a North Dakota State University Extension publication, adding Epsom salt leads to more blossom end rot.  Blossom end rot is caused by a deficiency of calcium, or something that might be more common in our area, infrequent watering.  Typically, we have enough calcium in our garden soils for tomatoes and peppers.  What can happen though is that we get busy during the summer and our watering habits fall by the wayside.  As plants are watered, and then not for periods of time and then watered again, calcium will be deposited only as far as the water gets and then it doesn’t get picked back up again. 

Photo courtesy of Michigan State University Extension
Now, back to the topic of Epsom salt.  Epsom salt contains magnesium sulfate, no calcium at all.  Adding Epsom salt to the soil may create more rot since magnesium and calcium compete for uptake into the plant.  The more magnesium in the soil, the less chance that calcium will be absorbed.

So, what can we do to prevent blossom end rot?  As I mentioned, typically we have enough calcium in the soil, so we don’t focus on the soil in this instance.  Instead, focus on watering.  The uptake of calcium depends on the uptake of water.  Irrigate regularly.  Avoid the extremes of waterlogged soil and droughty soil.  You might consider mulching around your plants to maintain consistent levels of moisture in the soil.
When weeding, consider cultivating shallowly.  Don’t damage the roots of your vines.  We need these roots to absorb calcium.  Also, avoid overfertilizing, especially with ammonium nitrogen fertilizers such as ammonium nitrate and most complete fertilizers such as 10–10–10.  Ammonium competes with calcium for uptake.  Calcium nitrate is a better choice.

Vines should be green but not lush.  Lush vines are more likely to suffer rot since actively growing leaves take calcium from the vine before the fruits get it.  As a general rule, don’t side dress a vine until after its first fruits set.
Calcium sprays might or might not help.  Mix 4 tablespoons of calcium nitrate per gallon of water.  Spray fruits, not leaves, two to three times a week.  The key time is when tomatoes are dime-sized or smaller.

Monday, May 18, 2020

Saving Seeds for Later

Jesse Fulbright, MSU Liberty County Extension

Let’s look into the future several months and plant a seed of thought in your mind, as it were.  If you’ve started your garden in the last month you may recognize that garden seeds have been a bit more difficult to find this year.  This is in part due to the increased interest in home gardening that people have shown with the COVID-19 pandemic.  If you have managed to get your hands on some seeds, or if you are able to do so in the near future you might be saying to yourself that you’re going to be better prepared next year.  One way you can be better prepared next spring requires some work this fall as you harvest and save your garden seeds.
Most of what I’ll cover this week comes from an MSU MontGuide titled, “Harvesting and Saving Garden Seeds.”  Free copies are available at your local county Extension office or online under the publications link at www.msuextension.org.

The first rule of thumb to saving garden seeds is to be careful about saving seeds of hybrid plants.  Seeds saved from hybrid plants usually will not produce the same plant the following year because most varieties are not self-sustaining.  Offspring of hybrids usually show an unpredictable mixture of characteristics from the grandparent plants instead of being like the parent.  For the sake of this announcement let’s say that your plants are not hybrids. 

Photo courtesy of UMN Extension
Think about later this summer when you are harvesting your garden.  How do you save your garden seeds?  Let’s cover how to save seeds from pods, like beans, peas and crucifers first.  Allow the pods to turn brown and then harvest the pods, dry them for one to two weeks in a warm, dry area and shell them.  Store the seeds in a paper bag in a cool, dry place, under 50°F.  Cruciferous vegetable seeds, like those from cabbage, broccoli, Brussel sprouts and cauliflower may carry diseases, so it is necessary to soak them in water that is at 122°F for 25 minutes for cabbage and 18 minutes for other vegetables.  Afterwards, you can dry and store the seeds as previously described, in something like an envelope. 

For seeds borne from a flowerhead, like lettuce, cut off the seed stalks just before all the seeds are dried.  Dry the harvested seed stalk, shake, or rub the seeds off and store them in an envelope in a cool, dry place. 
Saving the seeds in a fleshy fruit, like a tomato or cucumber is different still.  Pick the fully ripe fruit and first squeeze the pulp, including the seeds into a glass or plastic container.  Add a little water and let the mixture ferment several days at room temperature, stirring occasionally.  Viable seeds will settle out while nonviable seeds will float.  Pour off the pulp and nonviable seeds and spread the viable seeds in a single layer on a paper towel to dry.  You can then store them in an envelope like other saved seeds. 

I would encourage you to contact your local county Extension office for further questions about saving garden seeds, including biennials and herb seeds.

Monday, May 11, 2020

Asian Giant Hornets

Jesse Fulbright, MSU Liberty County Extension

There has been a lot of talk on social media lately, some in jest, some serious about the topic of “murder” hornets.  While there isn’t a risk here, as far as I know, there is a lot of curiosity and I wanted to put out some fact-based information about the hornets.
First, to be clear about the name, technically, the name of the hornet is the Asian giant hornet.  A hornet is simply a large wasp.  It is unclear where the “murder hornet” moniker came from.  The hornet was first discovered in North America in August 2019 in British Columbia, with other sightings occurring in Washington state in December 2019. 

The Asian giant hornet is the largest hornet species in the world and ranges from 1.5-2 inches long and is native to temperate and tropical Eastern Asia.  They can be distinguished from other similar species by their large size and yellow-orange head.  They only nest in the ground, taking advantage of things like hollow trees or rodent tunnels for their nests.  They have been known to target honeybee hives, particularly in July through November, and with only a small number needed to destroy an entire colony, they represent a large concern to the honeybee industry.  They also feed on other insects for food.
Photo courtesy of Washington State Department of Agriculture
 
While the Asian giant hornet does not usually attack humans, there is, I think, a large amount of concern about them, especially given the heightened sense of awareness that all of us are under due to the COVID-19 pandemic.  So, while the hornet is a potential health concern for us, as their venom is very toxic and they will attack if threatened, please remember that they are not among us at this time.  If you find yourself in a situation where you are being attacked by any bees, be they bees, wasps or hornets, there is some advice to follow.  First, get away from them as quickly as possible.  This doesn’t mean to bolt and panic, losing any common sense of your surroundings in your desire to get away.  I have seen examples of this type of behavior when people interact with bees and it can end badly, especially if one is near a busy street or parking lot.  So, don’t panic.  Bees, wasps, and hornets tend to give a warning before they begin an attack, even though you might not be aware of one.  The best strategy is to run and get far away.  Running in a straight line isn’t the only option.  Weaving around trees and bushes can help elude pursuing bees.  The best bet is to get inside a building or vehicle, if possible. 

Once again, the Asian giant hornet is not known to be in Montana at this time.  However, the public should be aware of potential invasion and notify the Montana Department of Agriculture if they suspect any Asian giant hornet activity.  Feel free to contact your local county Extension office also with further questions regarding this hornet.

Monday, May 4, 2020

Garden Soil Fertility

Jesse Fulbright, MSU Liberty County Extension


Let’s talk today about a topic that may increasingly be on peoples’ minds as our spring weather cooperates with us: gardens.  While we’re generally not ready for any outdoor plantings yet, it is a good time to be learning about soil fertility and what we can be doing to increase that fertility.  


Let’s talk about soil pH first.  Soil pH is a measure of the acidity or alkalinity of the soil and soil water solution.  This measure can be highly influenced by soil parent material.  pH is a logarithmic scale from 1- 14, with 7.0 being neutral. A soil pH less than 7.0 is acidic, while a pH of higher than 7.0 is alkaline, or basic.  Our soils are alkaline for the greater part, seemingly in the range of a pH of 8, dependent on the location.  Our soil pH affects how much, or if our plants can take up nutrients.  If soil pH gets too high or too low, it may make some nutrients immobile, and unavailable for plants.  We can see this as a nutrient deficiency, and it may look like a plant disease.


There are 17 essential elements for plant growth.  They are oxygen, carbon, hydrogen, nitrogen, phosphorus, potassium, magnesium, calcium, sulfur, iron, boron, chlorine, manganese, zinc, copper, molybdenum and nickel.  The focus though rests on three of those elements, nitrogen, phosphorus and potassium.  


Nitrogen favors vegetative green growth such as leaves and shoots.  Plants typically will use a lot more nitrogen annually compared to the other nutrients.  That makes sense, because nitrogen supports all the vegetative growth, and that’s a lot of the mass our garden plants produce.  Nitrogen also is a highly mobile element, meaning it leaches readily and needs replenishing on a routine basis.  Phosphorus promotes good seed and fruit ripening, maturation while potassium promotes gas exchange, new tissue growth, root and stem development, hardiness, fruit flavor and color.  All three elements can be readily applied, in different forms, depending on the time and season.

Sometimes you’ll want to add nutrients and fertility treatments to your soil and gardening for the current growing season.  You can incorporate compost and manures at the beginning of the season to feed the soil and release throughout the growing season.  You can add synthetic chemical fertilizers for rapid availability soon after.  You can add organically derived nutrients for quick availability as well.  Keep in mind that while in-ground beds have several options for nutrient management, raised beds and especially containers will need some additional nutrients during the growing season.